We have a tropical state of mind here at RadixBay’s Tabor City N.C. office with Summer just around the corner. Salesforce is releasing a wave of new features with the Summer ‘19 release. Here are some of our favorite features from the release!
End User Features
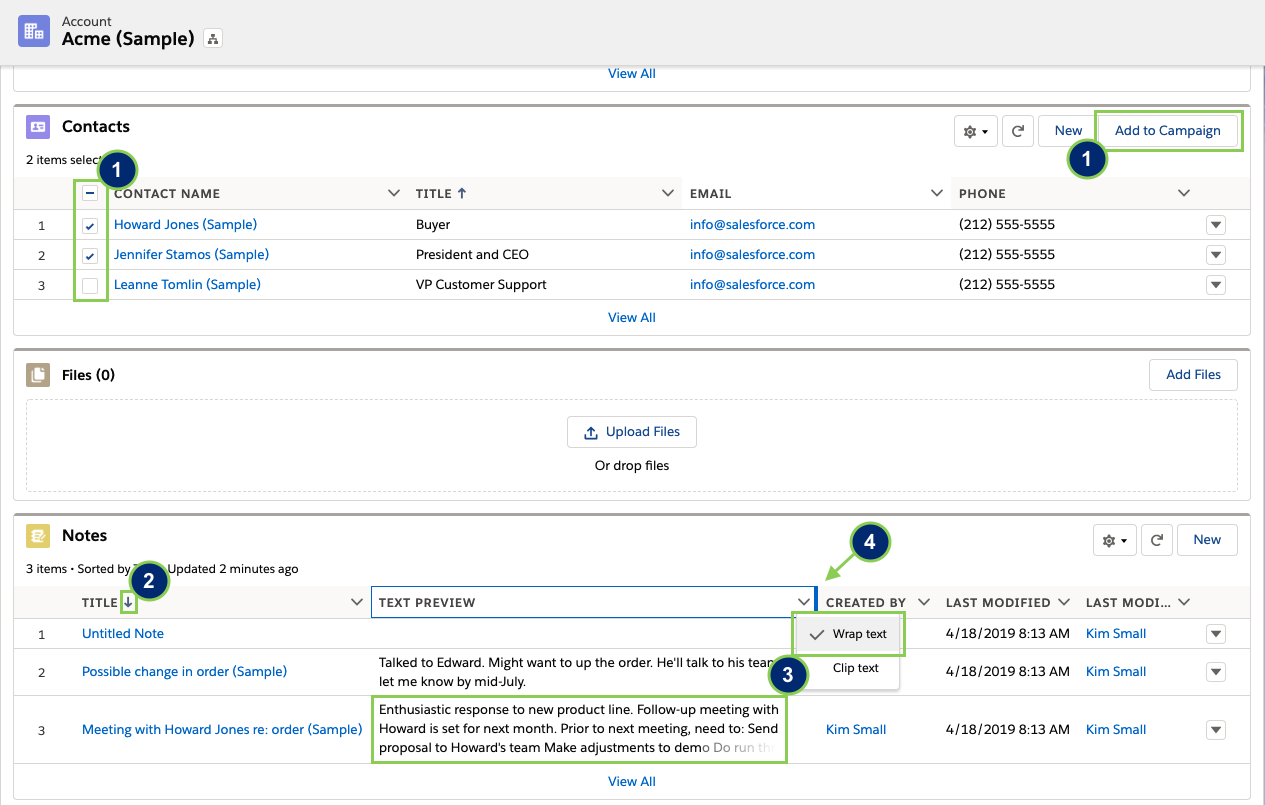
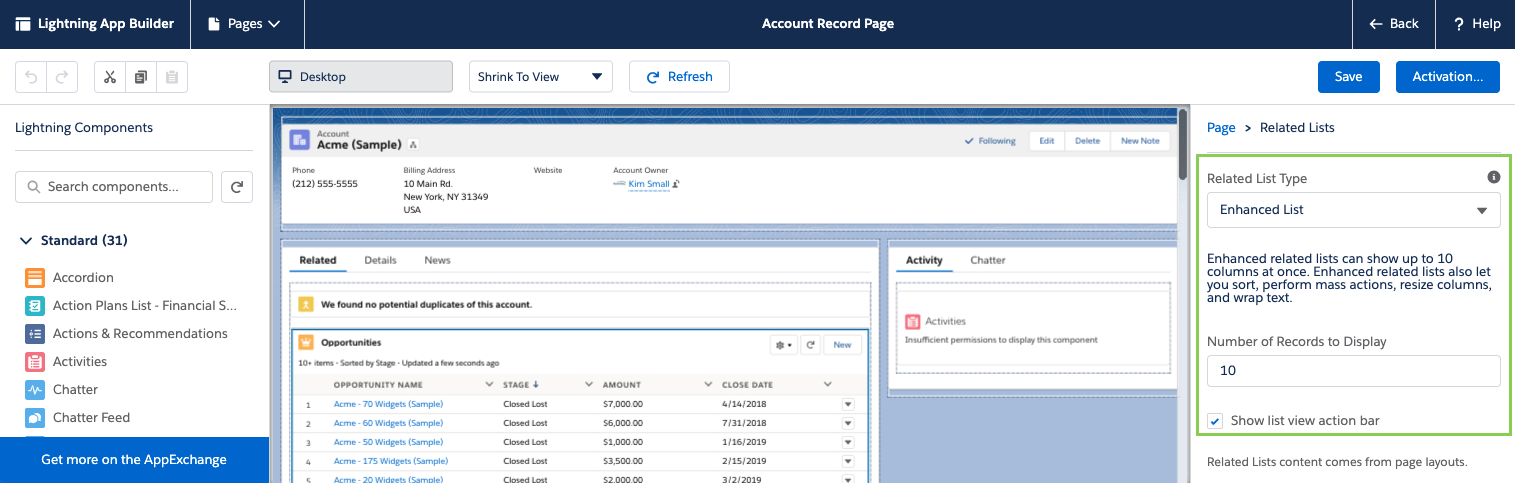
Enhanced Related Lists
Power up and use enhanced related lists to perform mass actions (1), sort information by column (2), wrap text in a column (3), and resize columns using the blue bar to the right of column headers (4).
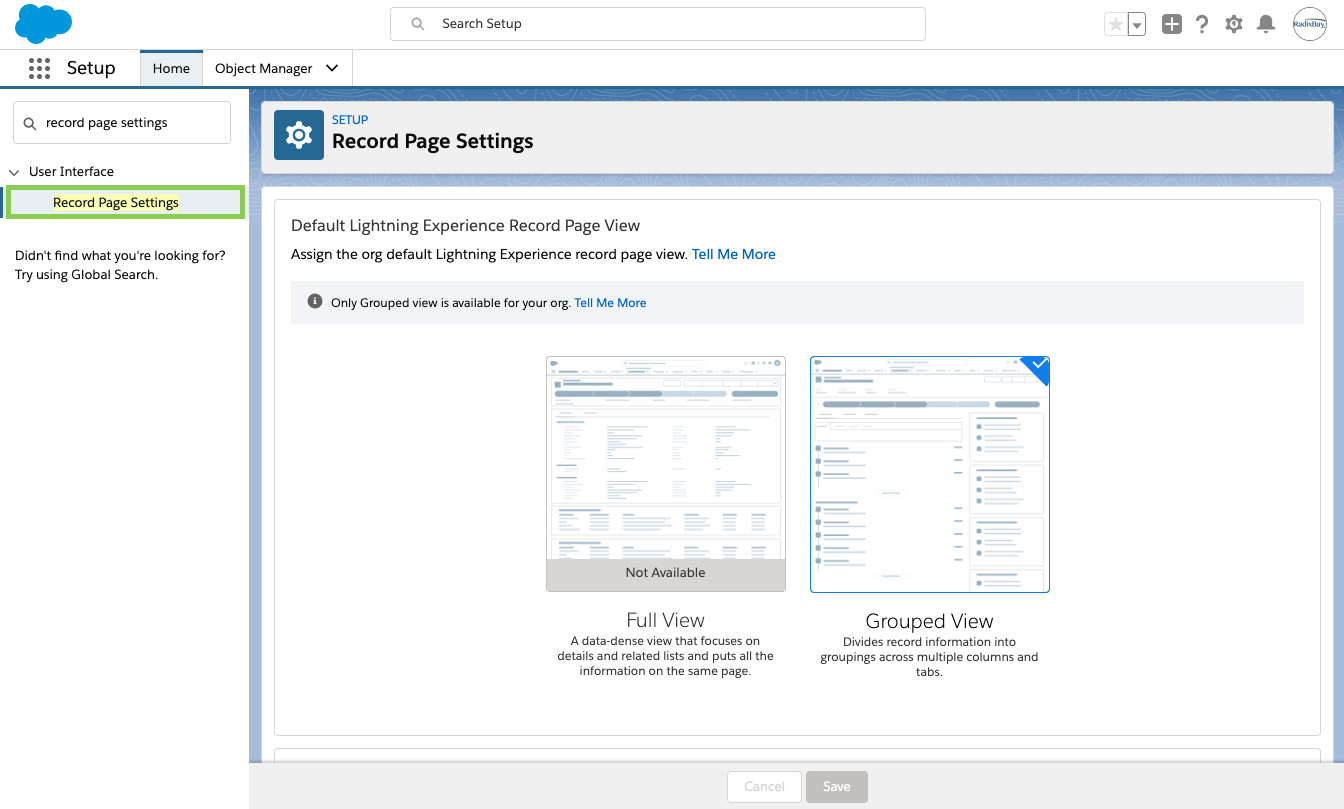
Change how Record Pages are Displayed
Admins now have the option to choose between two default record page views in their org. The Grouped View is the original view, where record information is divided and grouped across multiple columns and tabs on a record page. The Full View is a new record view that focuses on details and record information is displayed in related lists, all on the same page. The Full View is similar to how record pages are displayed in Salesforce Classic.
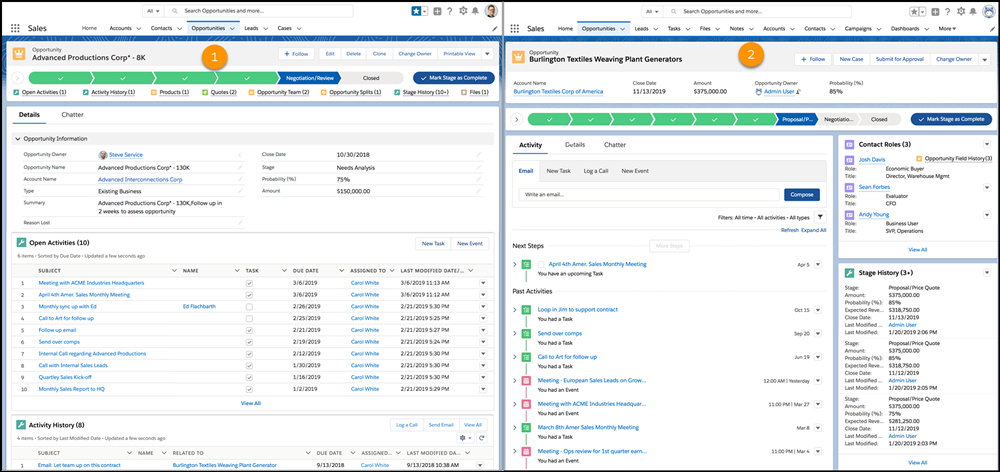
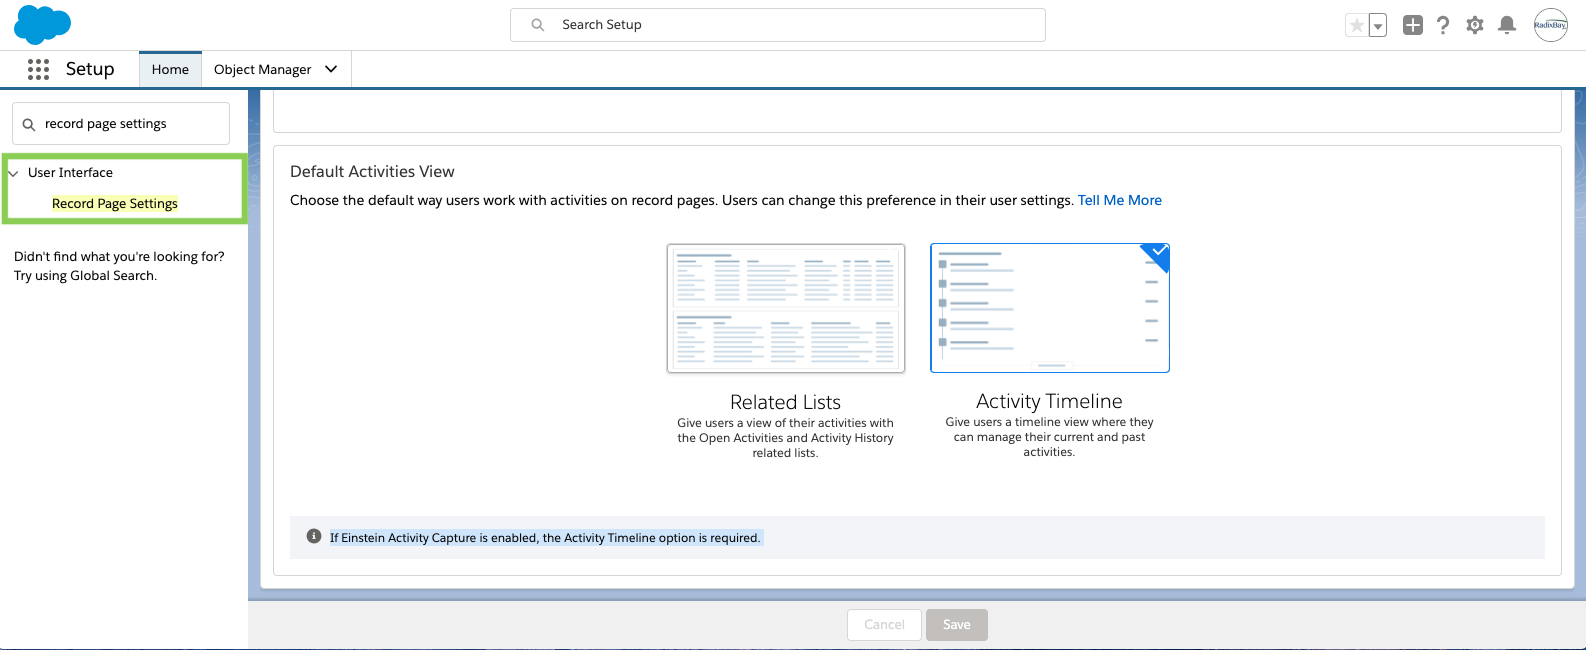
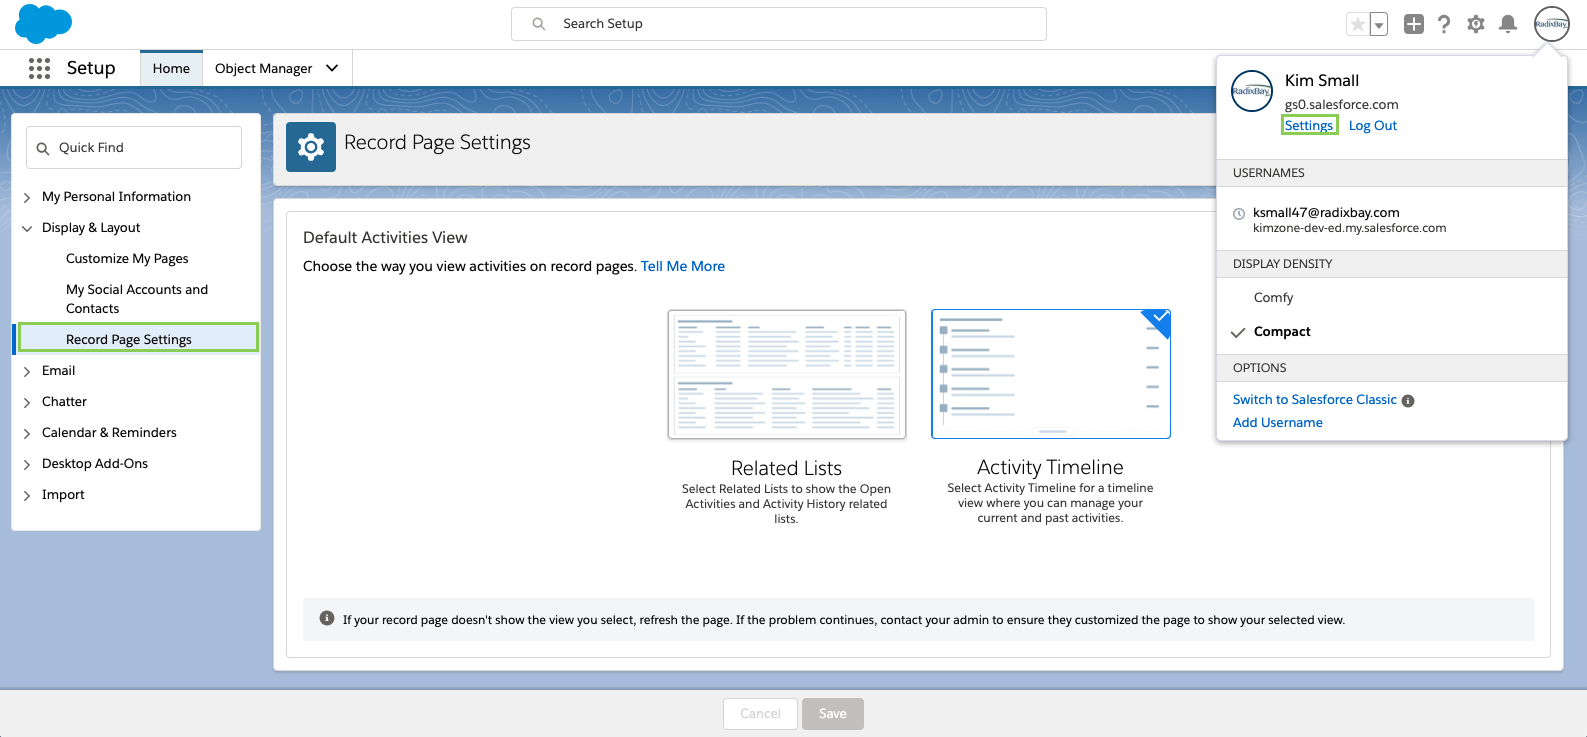
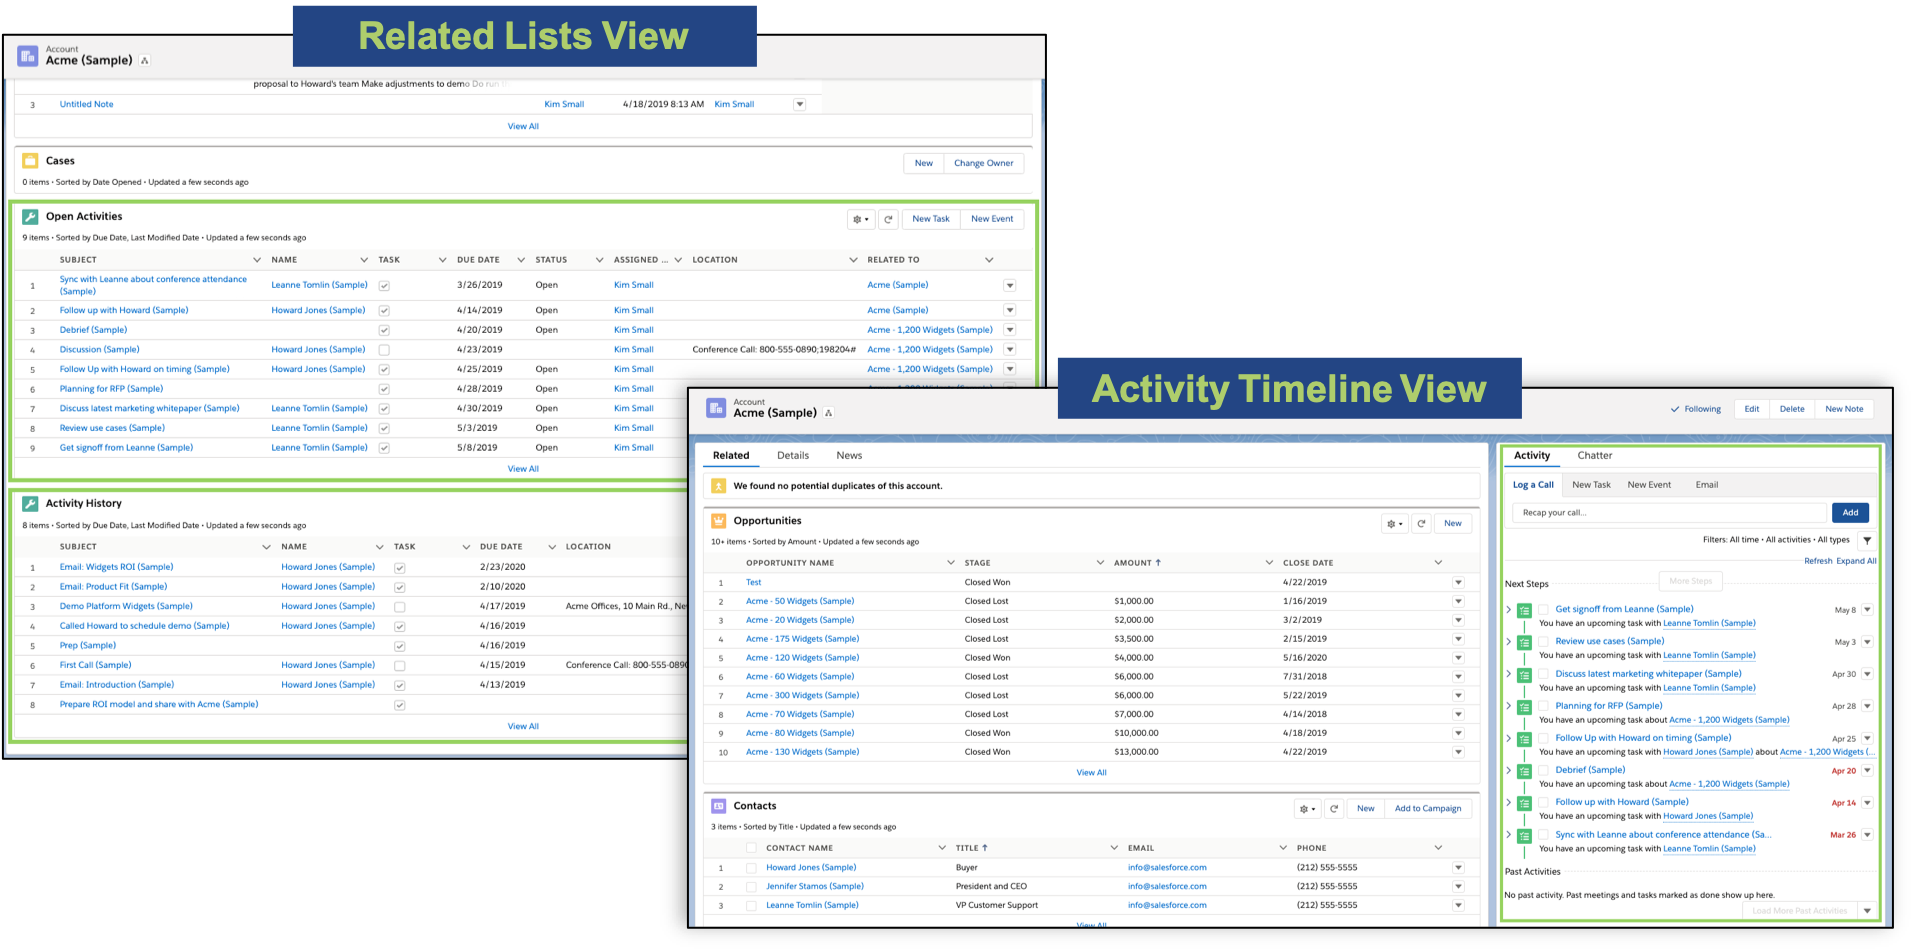
Change how Activities are Displayed on Record Pages
Control how activities are displayed on a record page using the brand-new activity views! Activities can be displayed in a Related List view or in an Activity Timeline view. To change the default activities view for the entire org, navigate to the Record Page Settings in the Setup menu.
Merge Cases into a Single Record (Beta)
Users are now able to merge up to three cases into one master case. This is helpful if you have duplicate cases or a few cases that relate to each other. To perform a merge, navigate to the Cases object and select a list view. Select up to three cases, then click on the Merge Cases button (note that the Merge Cases button is not available on the Recently Viewed list view).


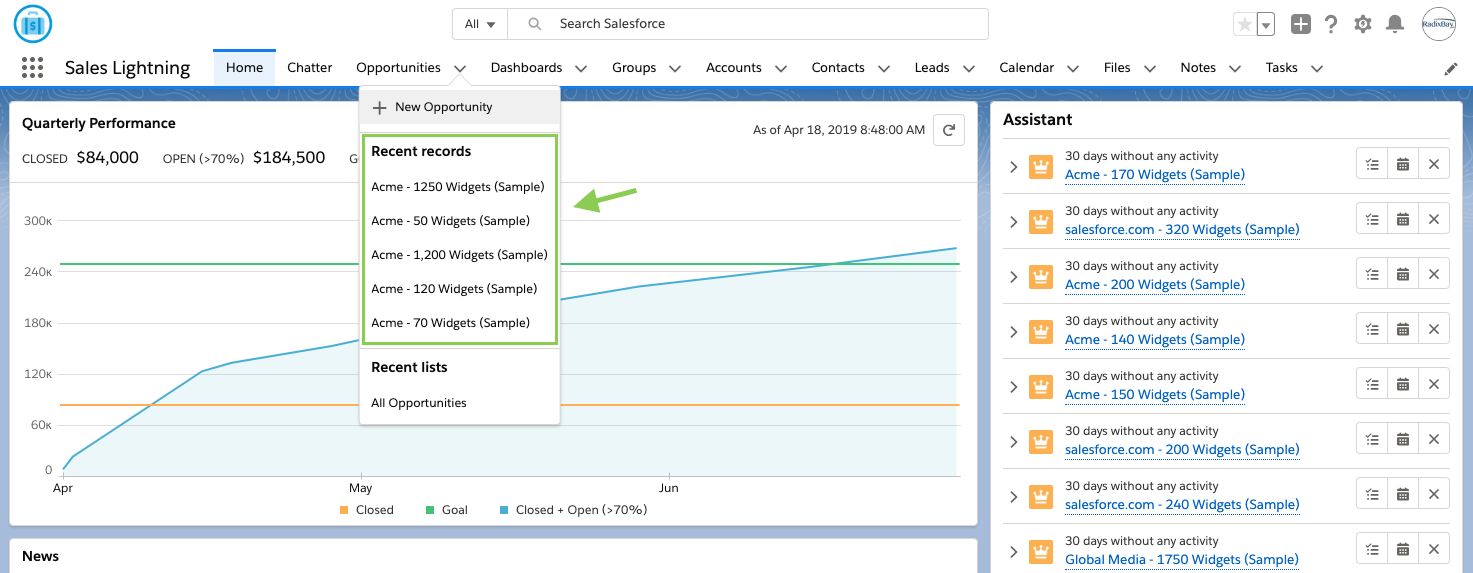
See More in Item Menus on the Navigation Bar
Users will notice slight changes to item menus. Item menus are the menus that appear when you click on a tab’s dropdown arrow in the navigation bar. These menus now display up to 5 recent records instead of 3. Salesforce also made some styling enhancements to item menus, which should make it easier to tell the different sections apart.
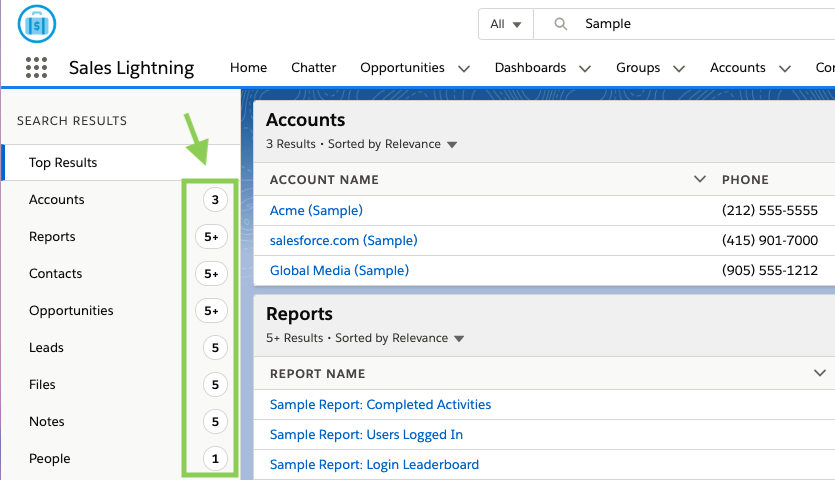
See Which Objects Were Searched at a Glance
Users will have an easier time finding what they need when performing a search in Salesforce. In the Top Results section of the Search Results sidebar, objects are now sorted by relevance instead of being listed in the same order as your navigation tabs. Users can also view the number of results for each object in the Top Results section of the Search Results sidebar. “5+” will display for any object that returns more than 5 results.
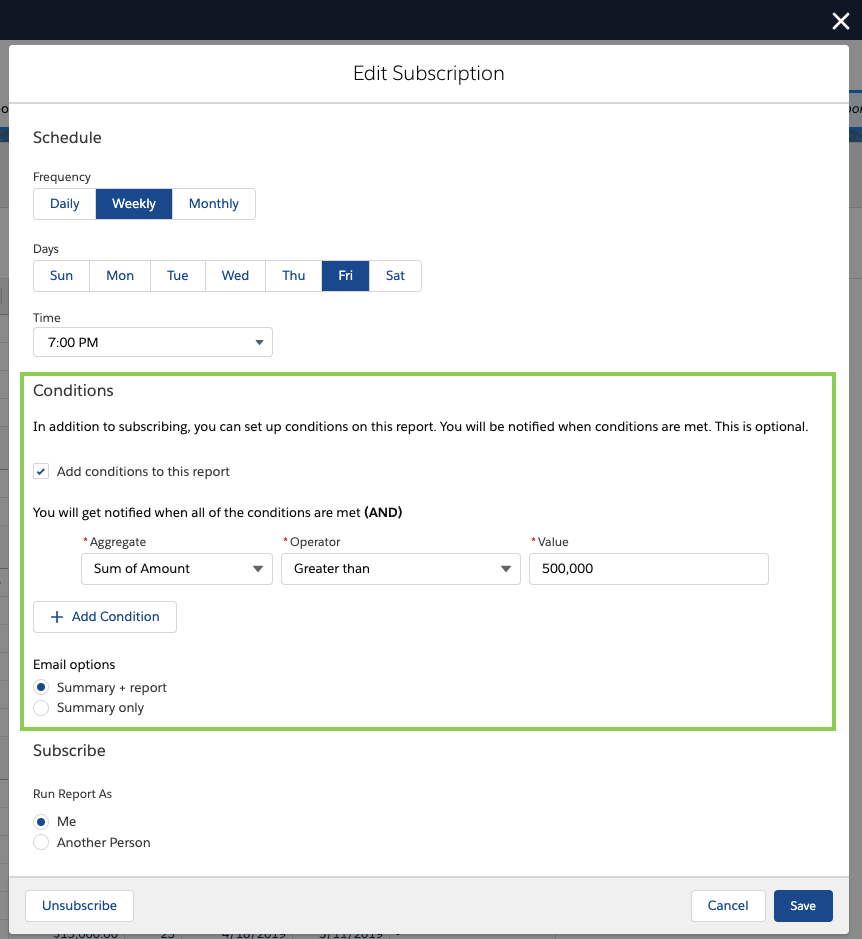
Subscribe to Reporting Using Conditions
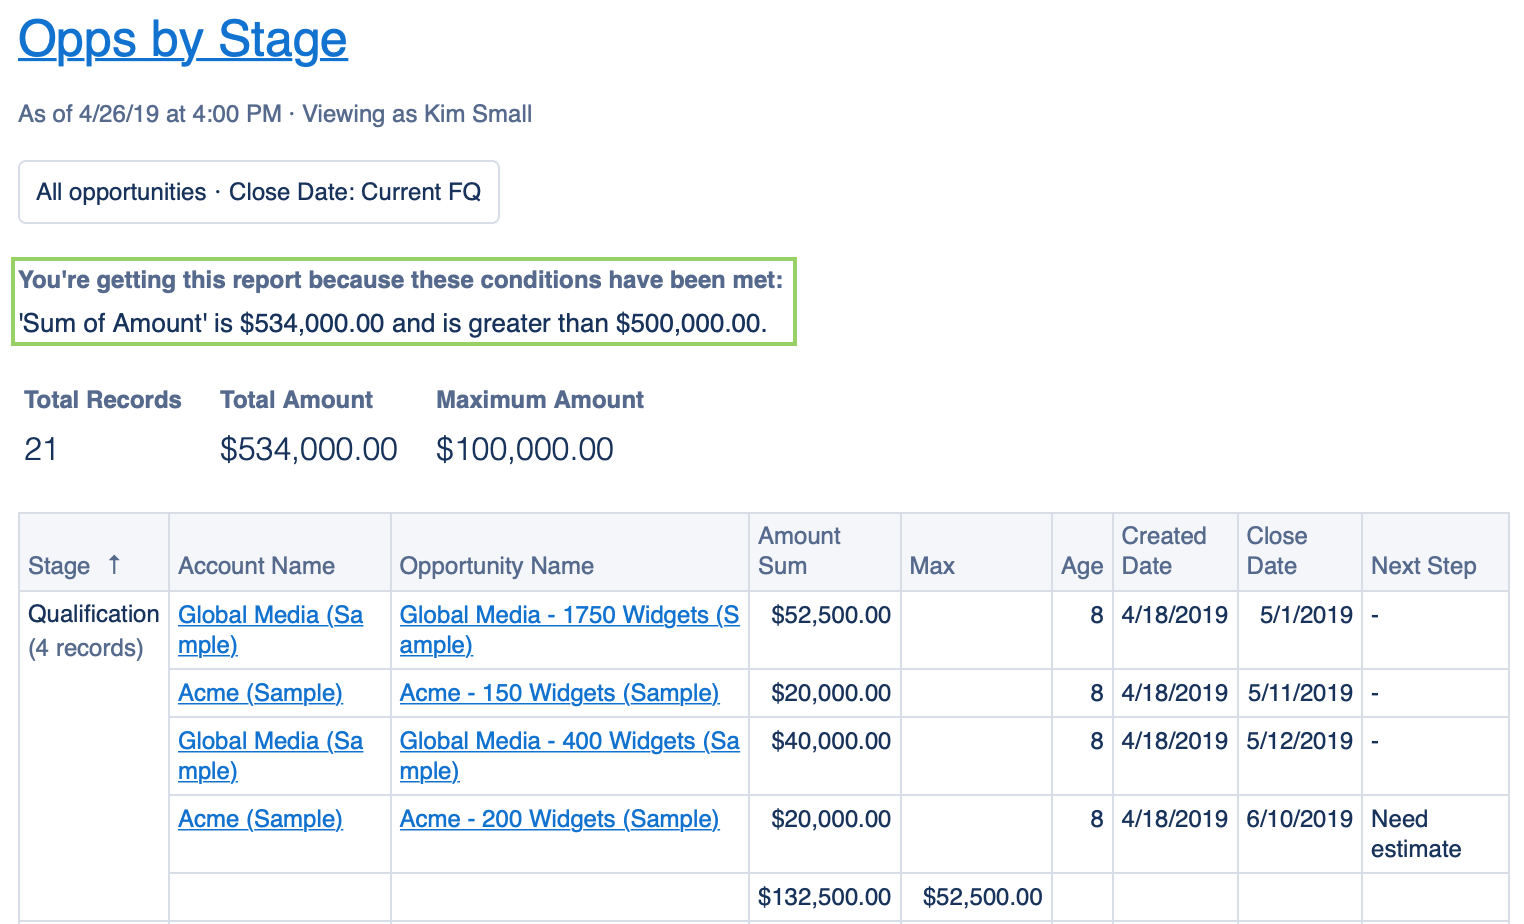
When subscribing to reports, you can now set conditions. This will allow you to receive email notifications whenever those conditions are met. Conditions can only be set on aggregates, which are the numeric summary fields that can be placed on columns in a report. For example, let’s say you have an Opportunity by Stage report with a summary field that lists the sum of opportunity amounts per stage.

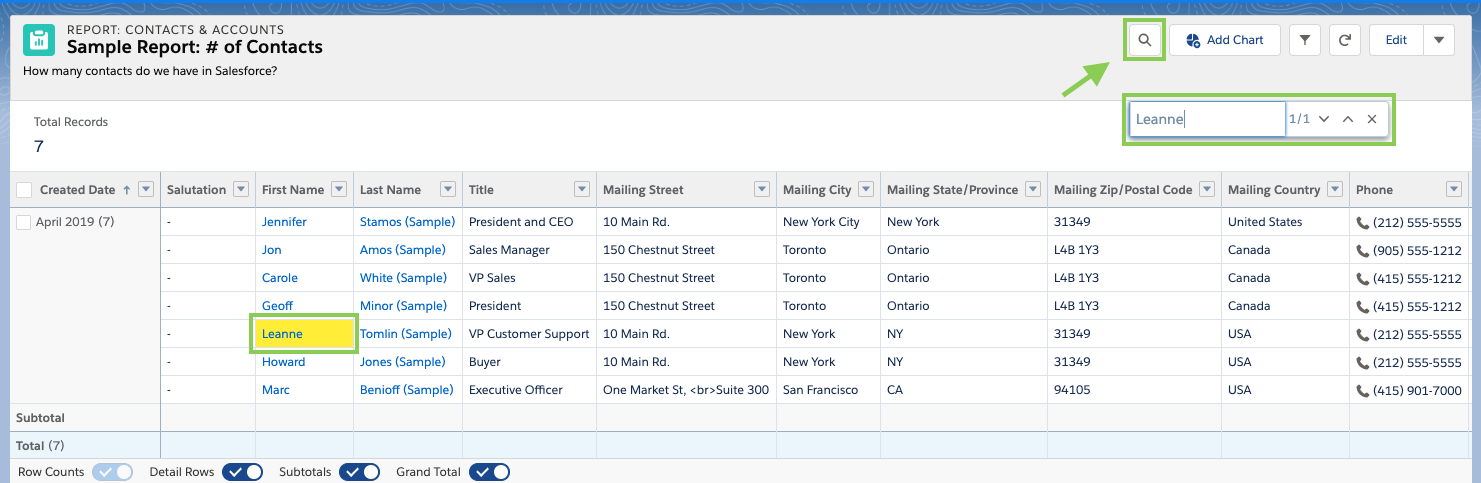
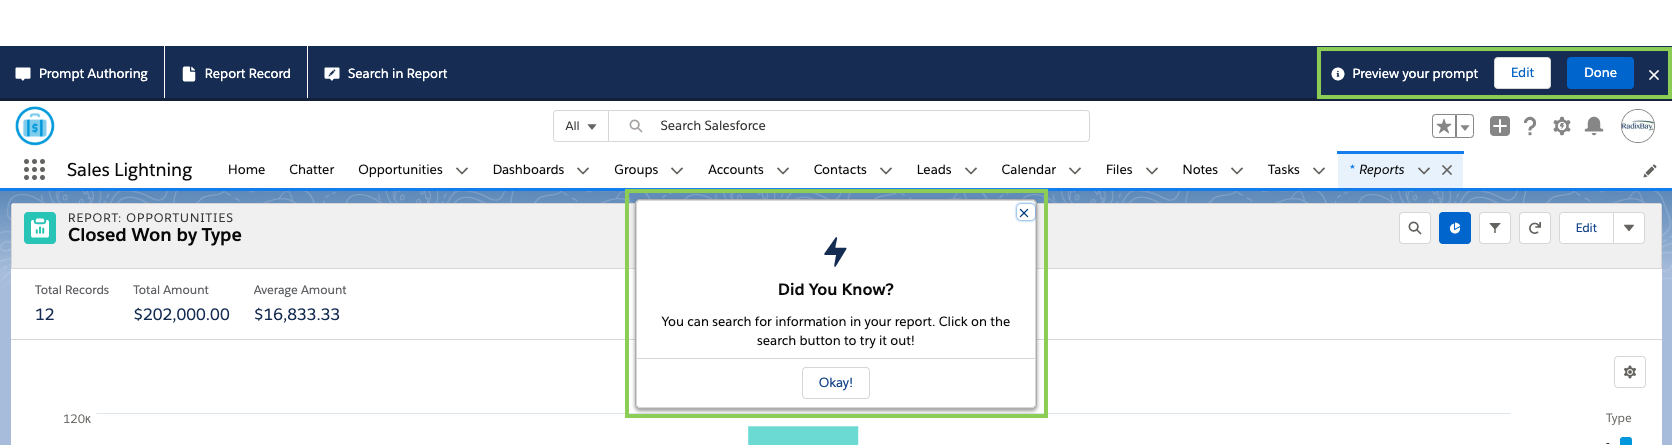
Search Information in Reports
User are now able to perform searches in reports! Open the desired report and click on the search button. A search pop-up will appear. The user can enter search terms in the search pop-up, and all search results will be highlighted in yellow.
Admin/Dev Features
Send Custom Notifications via Process Builder
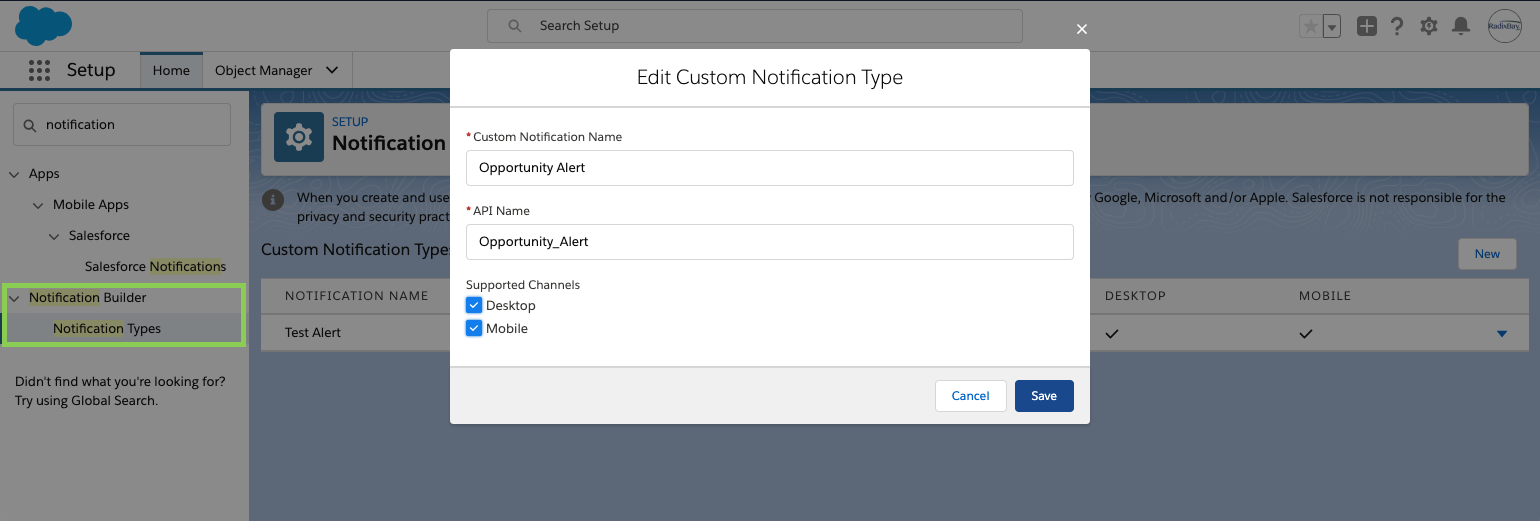
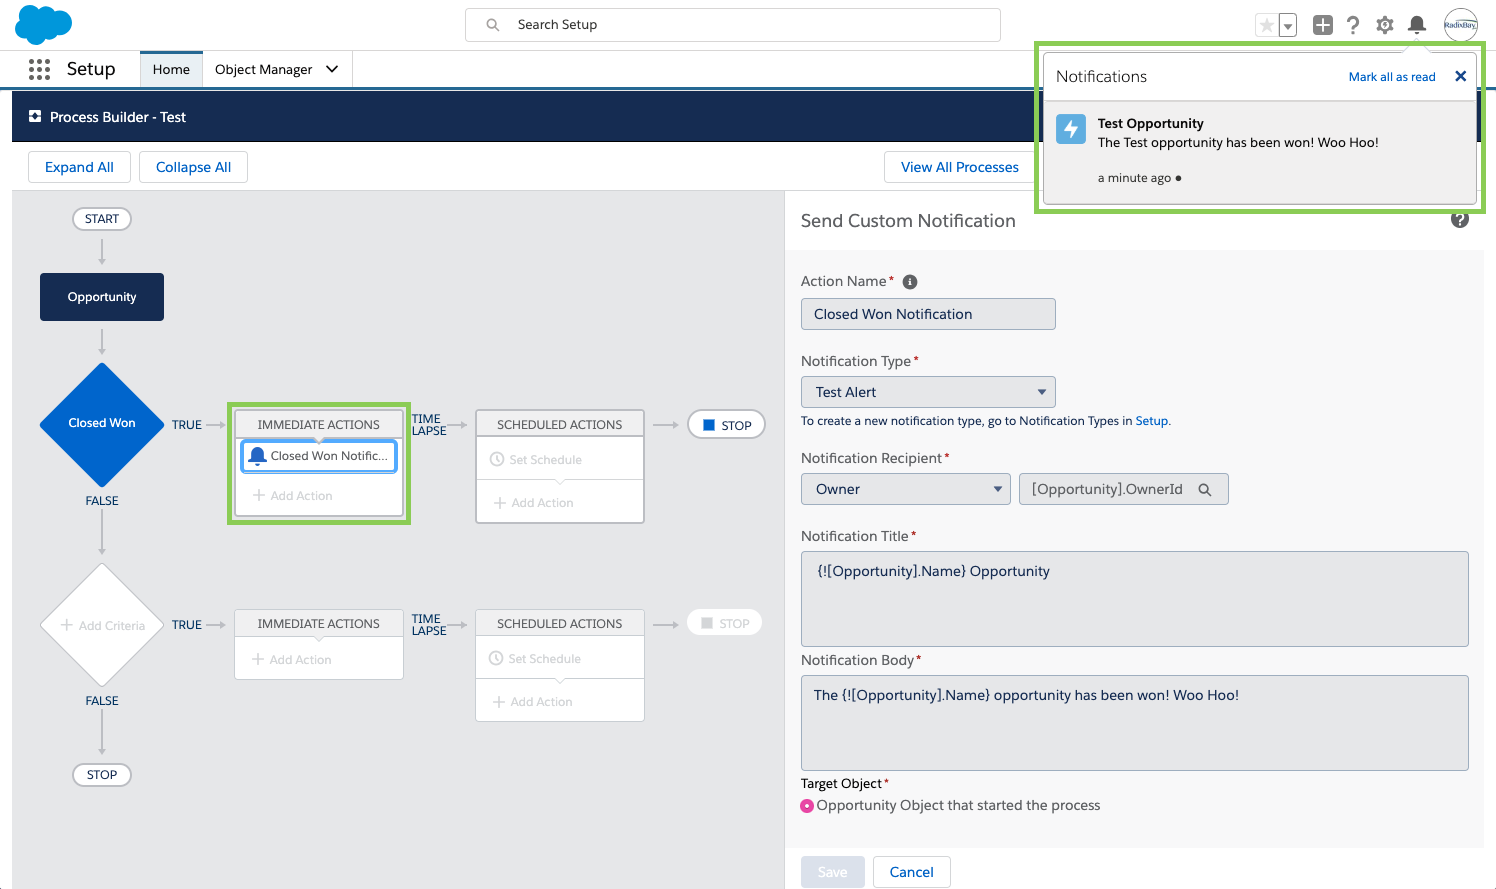
Do you need to send users reminders, important information, or alerts regarding activity in their Salesforce org? Try creating custom notifications with the new Notification Builder! For example, you can send a unique notification to opportunity owners whenever their opportunity’s stage changes to Closed Won.
You can create notification types via the Notification Builder in Setup. All you have to do is choose a name for your notification, the API name will auto-populate, and select whether or not you want this alert to display on desktop, mobile, or both. Once you save the notification type, you will be able to select this notification type in the Process Builder when creating custom notifications.
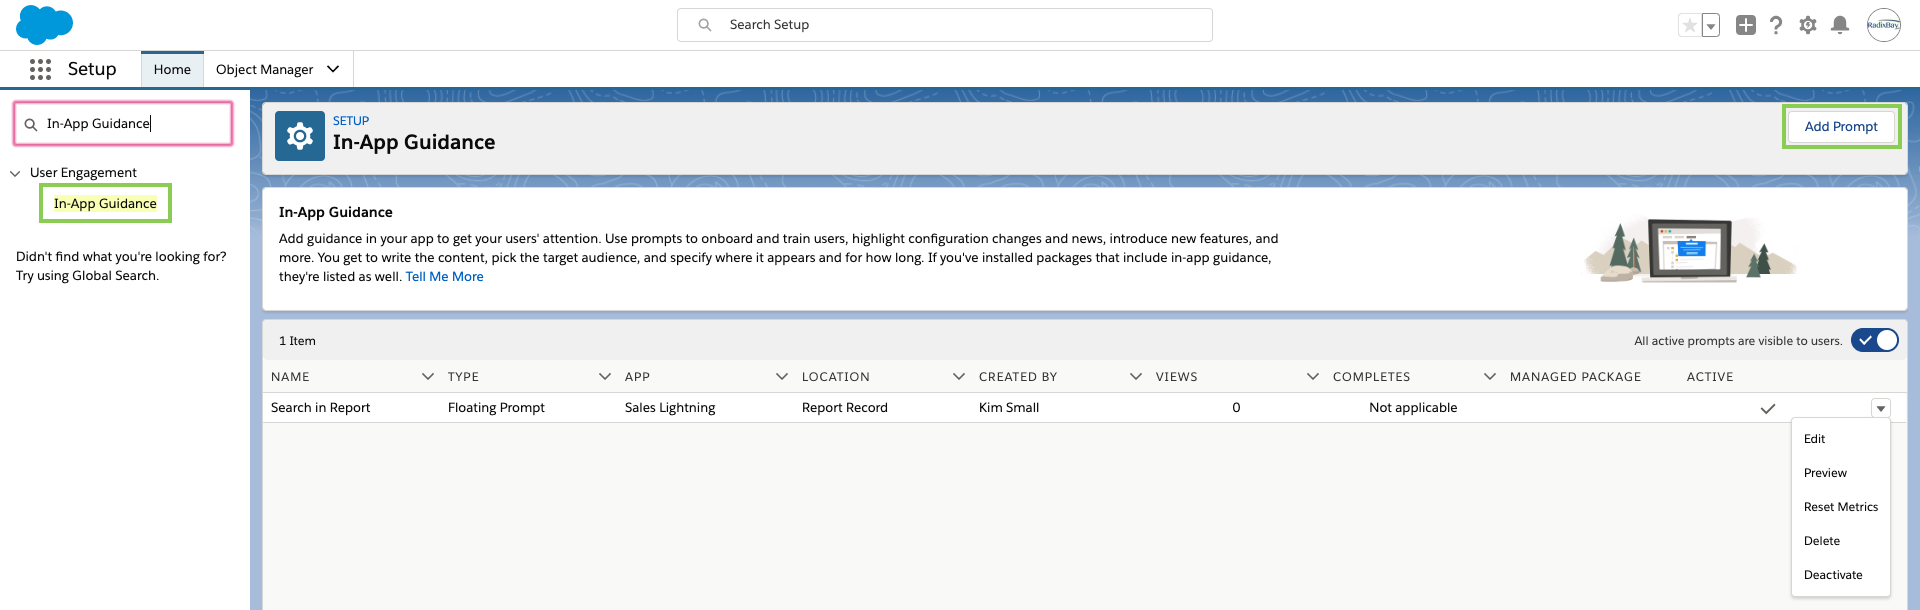
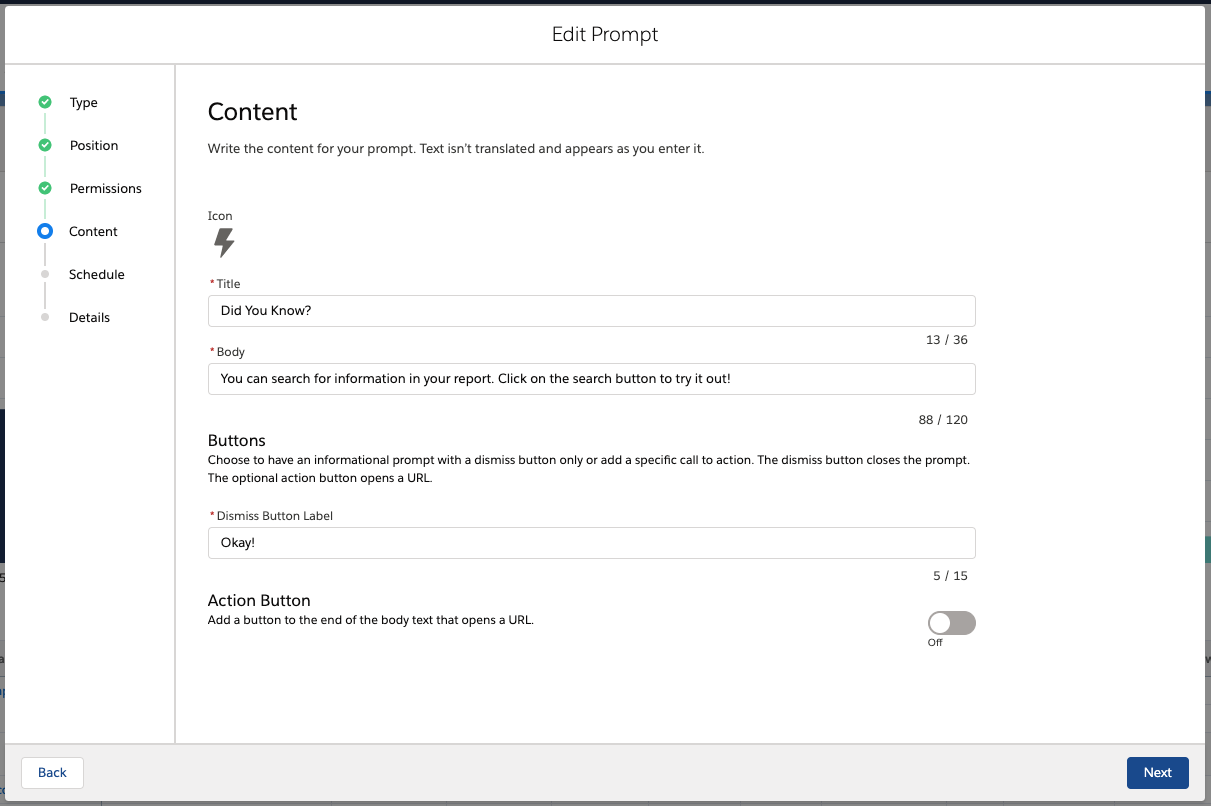
In-App Guidance
Use In-App Guidance to create prompts for your users as they navigate through Salesforce. Prompts can be used to inform users of helpful and important features, train newer users, alert users of any changes, and more! Navigate to In-App Guidance in Setup to get started. You will be able to view any prompts you created here, as well as add additional prompts.
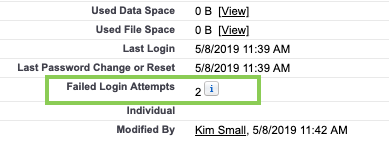
View Number of Failed Login Attempts
Admins are now able to view the number of failed login attempts on a user record. You can reference this field before you look at the login history. If a user reaches the maximum number of failed login attempts, this counter will reset, and the user’s account will be locked. If the user successfully logs in before the maximum number of failed login attempts is reached, this counter will reset.
Salesforce Survey Freebies
Salesforce Surveys have been around since the Spring ’18 release. However, with the Summer ’19 release, any user with one of the following profiles can create and send surveys for free!
- System Administrator
- Contract Manager
- Marketing User
- Standard User
Each Salesforce org now has the ability to receive up to 300 survey responses for free! Response packs can be added for an additional cost, but you should take advantage of free surveys while you can.
Wrapup
If you haven’t already, sign up for a pre-release org and try out these features yourself! Also, use the links below to make sure you are prepared for release.
About RadixBay
RadixBay is a Salesforce Registered Consulting Partner. From needs analysis and initial system configuration to customizations, upgrades, and ongoing support, RadixBay is your trusted partner throughout your Salesforce journey. Our dedicated team of certified experts help you to fully customize your deployments to meet your needs and maximize your investment in the Salesforce product suite.
I hope you enjoyed my article on the Salesforce Summer ’19 release’s new features!
To learn more about our Salesforce services and how RadixBay can help, please visit our RadixBay Salesforce Center of Excellence.
Kimberly Small
RadixBay Salesforce Consultant
Salesforce Certified Platform Developer I
Salesforce Certified Platform App Builder